


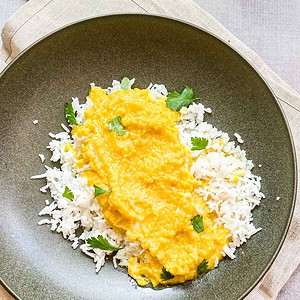
This simple and creamy moong dal recipe comes together on the stove in minutes --no pressure cooker or instant pot needed. It's a great dal recipe full of delicious flavor.

Jump to:
What is dal?
Dal refers both to dried lentils as well as the final cooked dish made from these lentils. Dal in my native tounge, Tamil, is called paruppu. There are many types of dried dal ranging from moong dal which is a thin dal that can be quickly cooked into a stew or "curry" to urad dal which is a thicker, plumper dal used in dishes like dosas or idlis. If you are looking to learn even more, this blog post goes into details about the common dried dal varieties used in Indian cooking
Dal, the dish, for many South Indians like myself is a staple that was always around. It was easy to whip up and there were tons of variations to be created based on the vegetables in season to the tempering, tadka, or thalipu we decided to flavor the dal with. There are many methodologies and techniques for cooking dal and I highly recommend reading my detailed how-to guide on cooking any dal as a great primer before making this recipe as well as to empower you to make any variation of dal.

Moong dal is easy to cook on the stovetop
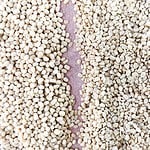
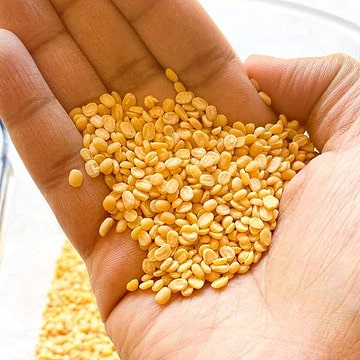
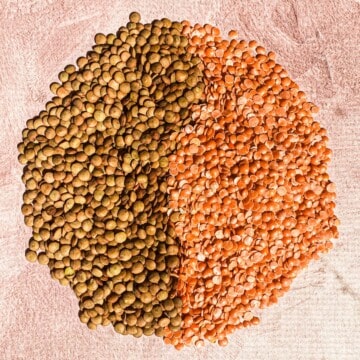
We will be using moong dal in this creamy, delicious dish. Moong dal which is also called green gram dal in english and payatham paruppu in Tamil is a thin yellow dal that cooks super quickly. When searching for this dal at the Indian super market you want to look for split moong dal (hulled). This split dal can either be pressured cooked in a pressure cooker or instant pot or cooked on the stovetop until the lentils loose their shape and meld into a homogenized "curry" that tastes so decadent.
 Buy Now →
 However, in this recipe, we will cook the split moong dal on the stovetop. Moong dal is an ideal dal for stovetop cooking compared to other dals due to its thin shape which allows it to cook quickly and gently --without the need of a pressure cooker to hasten the process. My grandmother would say that this is the dal that that will feed an unexpected guest at dinner. It's simple, it doesn't need soaking, and it tastes so creamy.
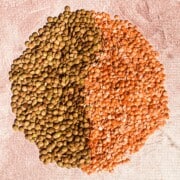
A good substitute for this dal that is sometimes more readily available at American grocery stores is masoor dal (split) aka red lentils. It has the same cook time as moong dal and is a 1:1 substitute.

Masoor Dal (Red Lentils) - Split
Buy Now →Ghee and lemon juice - no fancy thalipu (tadka) needed
When I titled this recipe as a simple dal, I really meant it. It is a basic dal that really hi-lights the legume itself and isn't pretentious. It can be used as a base dal recipe to add into sambars or even rasams to add more protein.
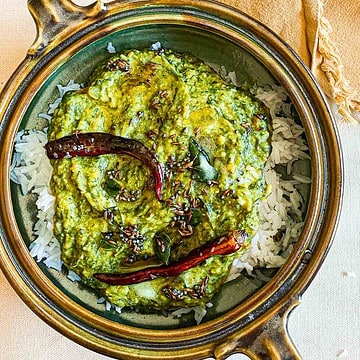
That is why I choose for this dal to not have thalipu or tadka on top. It uses the nutty and buttery flavor of ghee as a topping and optionally lemon juice to add the acidity needed to balance the creaminess. But does that mean you can't add thalipu or tadka? Absolutely not! Make this dal your own with the tempering or flavor enhancers of your choice, this is just a great and simple weeknight dish to start your love affair with dal. If you are looking for a dal with more spices, you can also try out the spinach dal which is a great way to get your greens in!
Techniques to make the creamiest dal
I want weeknight dal to be as easy as making your weeknight pasta dish. I want it to become so second nature that you don't even have to think about it. But as with making pasta, there are a few tricks that really help when making this simple stovetop dal. For an even more detailed guide on cooking dal, checkout my how-to: cook any Indian dal. It goes into detail on soak times of various lentils and different methodologies of cooking your perfect bowl of dal. But below is a high level overview...
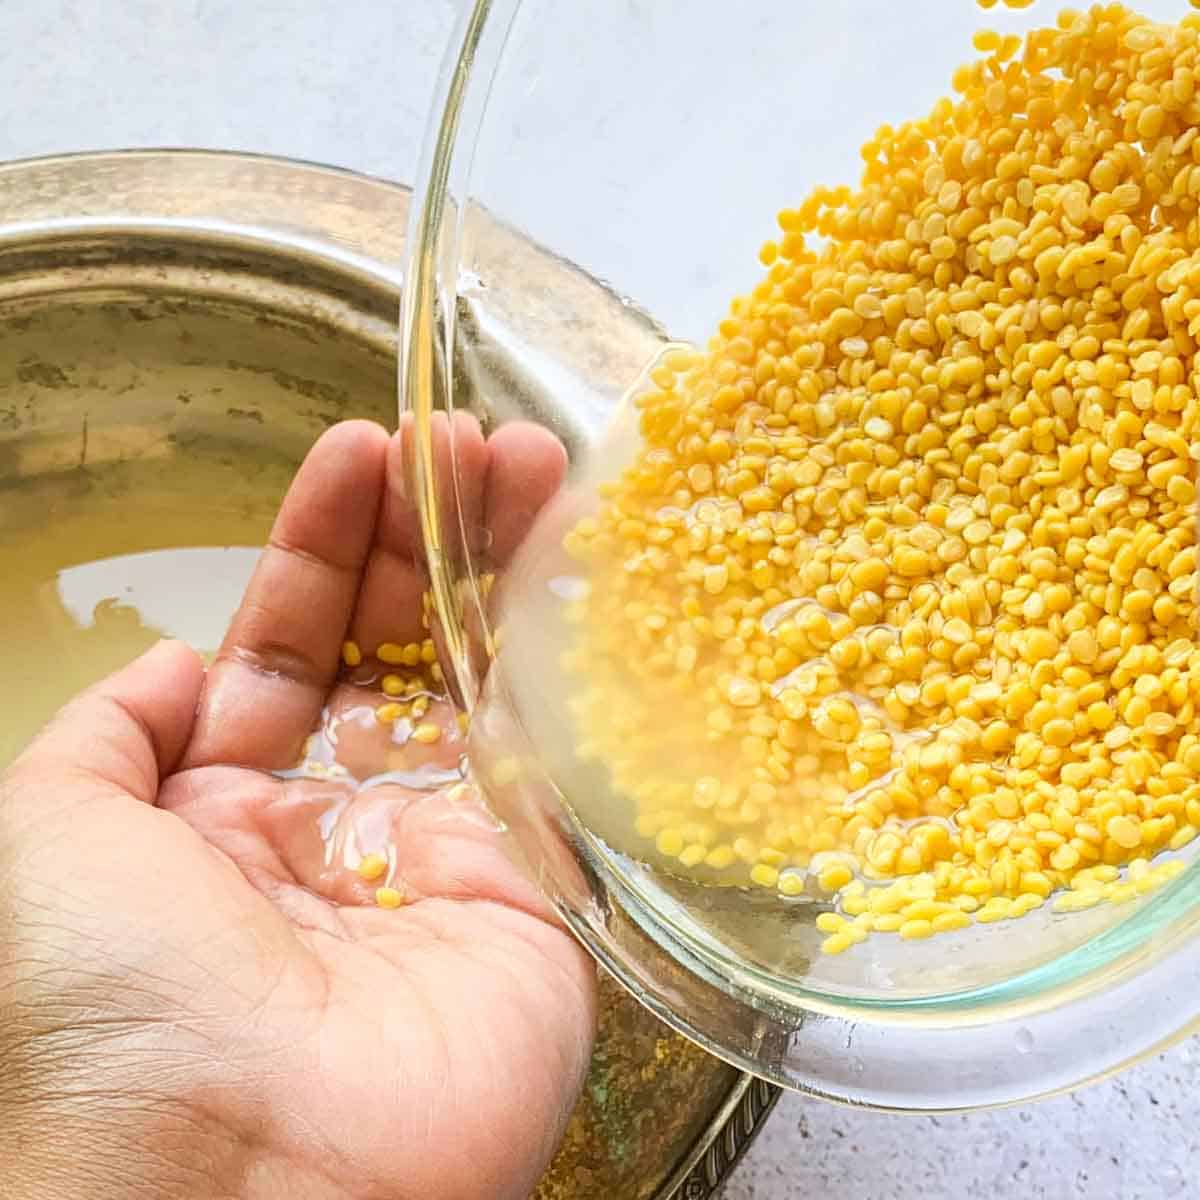
- Wash your dal - Please please please wash your dal and also your rice if you make it to accompany your dal. Removing the residues and starches will help give a cleaner flavor to your dal and ensure a creamy and consistently cooked dal. To wash the dal, simply rinse and gently scrub the dal. The water will be murky in the beginning but pour it out and repeat the process until the water runs mostly clear.
- Add oil to the water when making dal on the stovetop - Adding oil to the dal cooking water will not only help your dal emulsify into a creamy consistency later when the dal is cooked but this trick helps prevent the water from boiling over when cooking dal. Why? The surface tension of the oil that floats on top of the water helps disrupt and pop the starchy water that tends to foam and overflow! This is exactly the same principle for pasta water
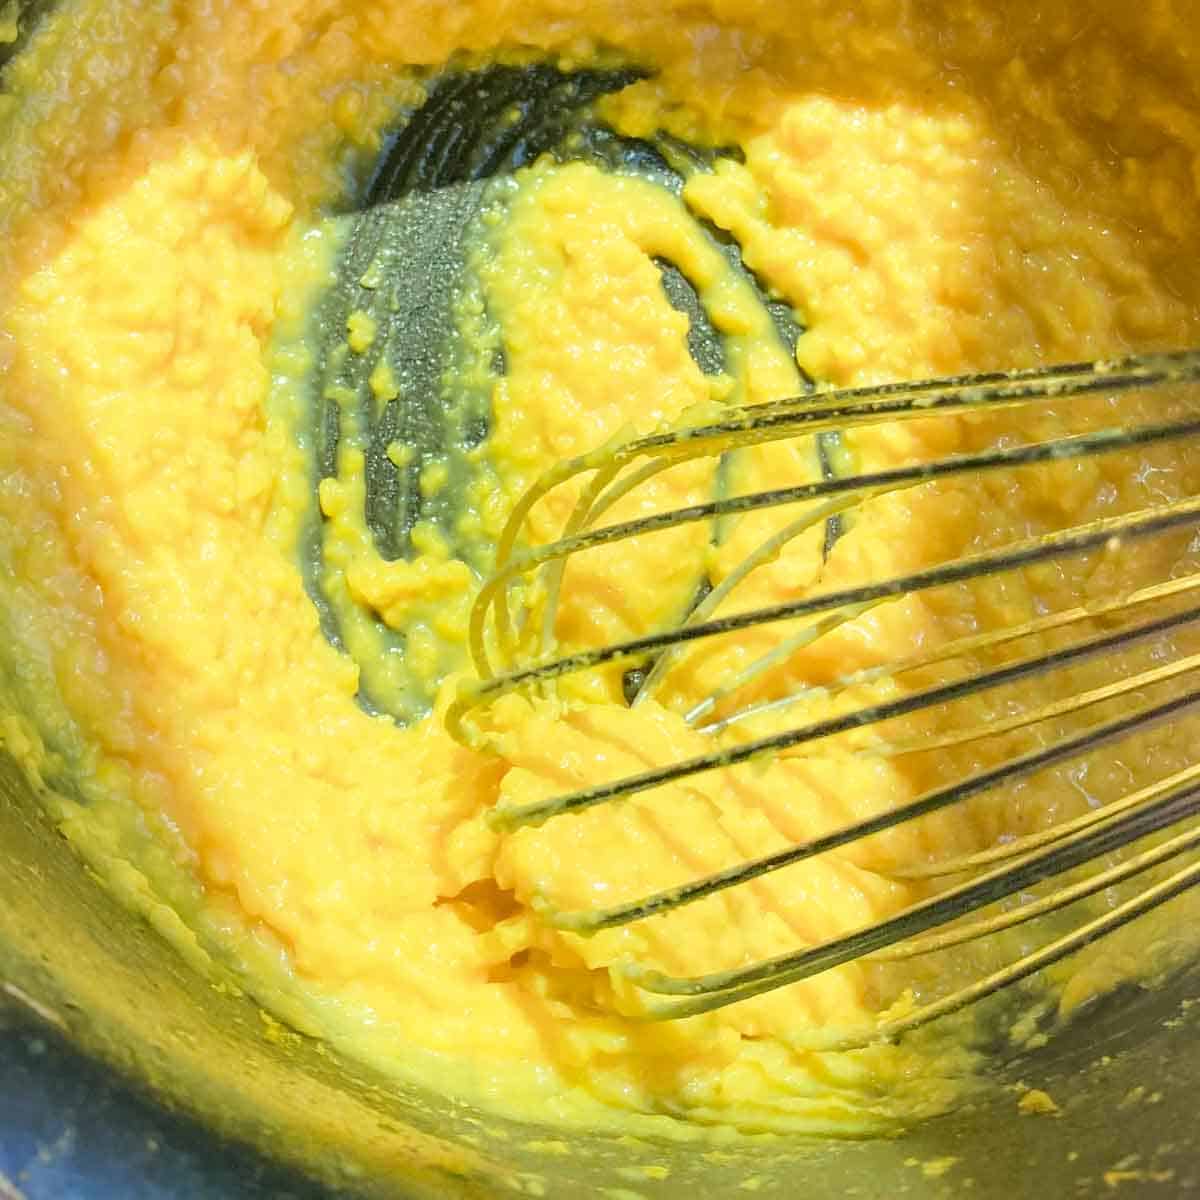
- Whisk your dal - Whisking cooked dal with a dollop of ghee makes the creamiest dal. There are wooden Indian whisks that were traditionally used to whisk yogurt and dal but you can use the whisk that you use to beat your eggs or even a wooden spoon to really help emulsify the fats and the water in the dal into a homogenous creamy mixture. This trick really elevates your dal from good to great!
Related Recipes To Try
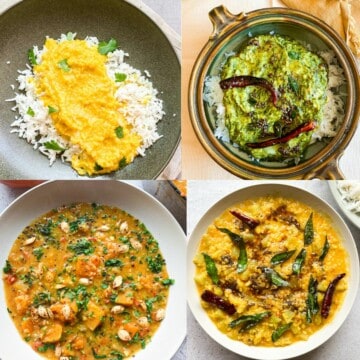
If you are looking for other recipes to try that are similar to this dal recipe. Checkout the spinach dal recipe which will get your daily dose of vegetables or this chow chow kootu which is a South Indian style chayote squash dal! Both of these can be made in the Instant Pot or on the stovetop. If you are adjusting the recipe for the stovetop, follow the general guidelines and cook time listed in the recipe card below.
Frequently Asked Questions
Masoor dal is a great substitute for moong dal. It is thin like the moong dal which makes it a great candidate for stove top cooking with no soaking needed. Read this post about other dal varieties and substitutes.
You can absolutely soak your moong dal before you make it but it is not a requirement unlike thicker dals. Soaking is just an insurance policy to ensure that the dal cooks throughout and saves time during the cooking process. However, if you didn't have the hindsight to soak your moong dal, do not fret as it is a forgiving dal which cooks quickly regardless of soaking.
Yes you can absolutely make your dal in an instant pot.
Yes. It's highly recommended that you wash dal before cooking. Washing the dal removes the excess starch and residues that are present during the factory processing stage and ensures that the dal has a clean taste and consistency.
You can easily buy split moong dal online or at your local Indian grocery store.
Moong Dal without Pressure Cooker
Product Reccs


Ingredients
- ½ cup split moong dal 100g
- 1 ½ cups water
- ¼ teaspoon turmeric powder
- ⅛ teaspoon asafetida (hing) (Optional)
- 2 teaspoons ghee or butter plus more as topping
- ¼ teaspoon sea salt plus more to taste
- 1-3 teaspoons lemon juice to squeeze on top
- cilantro for garnish (Optional)
- cooked basmati rice or roti for serving (Optional)
Instructions
- Wash the dal: ½ cup split moong dal to a pot that has a lid and bring over to your sink. Fill the pot halfway with water and swish and lightly scrub the dal with your fingers to release the excess starch in the dal. Drain the cloudy water and repeat this process until the water is fairly clear and drain once more.
- To the pot of dal, add 1 ½ cups water, ¼ teaspoon turmeric powder, ⅛ teaspoon asafetida (hing) and half of the 2 teaspoons ghee or butter. Place it on the stovetop on medium high and allow for it to come to a boil. Once it reaches a boil, cover the pot with its lid, reduce the heat to medium, and allow the dal to actively simmer on medium heat for 15-20 minutes. Keep an eye on the pot during this time. You may need to lower the temperature if the water starts foaming or add more water if the too much water has evaporated.
- Once the time is up, remove the lid from the dal. The dal should be cooked through and should be mushy to the touch. Use a whisk and mix to see if the dal easy whisks together with the water to form a creamy consistency. If not and the water and dal remain separate, cook the dal for a bit longer.
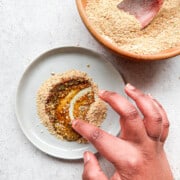
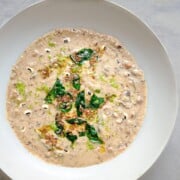
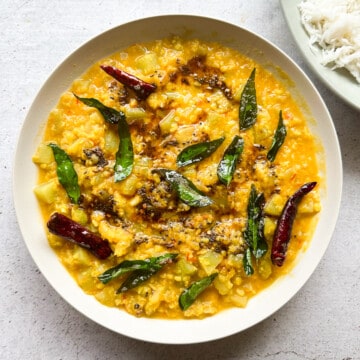
- Once dal is cooked, add ¼ teaspoon sea salt and the remaining half of the 2 teaspoons ghee or butter. Use either a whisk, or a wooden spoon to mix up the dal until it becomes a creamy homogenized dish. Taste your dal and add more salt as needed. Squeeze some 1-3 teaspoons lemon juice to squeeze on top, add a dollop of ghee, and garnish with cilantro! Enjoy with basmati rice or roti.
Notes and Tips
- Helpful readings:
- Read this blog post for in depth details on moong dal and its substitutes.
- Read this blog post which is an in depth blog post on how to: cook any dal. It will give you even more tips and tricks for mastering this fundamental dish.
- If the water starts to run low when you are cooking the dal, you can add ¼ cup of water to the pot at a time to the pot. If there is too much water at the end of your cooking process, first try whisking your dal. This helps thicken and emulsify the water and fats in the dal to create a creamy texture. However, if the dal is still too watery, allow the dal to simmer with the lid uncovered
- This is a very basic and simple dal recipe that is a good starting point. If you want to add a layer of depth to your dal you can add a finishing oil or tadka to it. To do this, simply heat oil or ghee in a sauce pan, add aromatics of your choice like cumin seeds, curry leaves, or even garlic to the oil to heat and infuse the oil. Pour oil/ghee over the dal to add layers of flavor.
- You may also like this recipe for spinach dal or chow chow kootu
Shri Repp says
RAAZ says
Best 👍 I like, like, like all time such yammy simple and quick recipes it's Best part is that it's depend upon our own choice to make it Spicy, salty or Normal according to choice ☺️👍
Shri Repp says
I'm so glad you liked it!
Ana says
I made this last night and it was delicious! I did have to cook it for much longer (45 min) because it was not getting soft. I did not know if I should cook it on high, med, or simmer? I experimented with high at the end and I whisked it. I used butter because i did not have ghee. The moong dal has a strange smell at first. I thought maybe they were spoiled. They were good. I added lemon at the end and some curry powder instead. Came out very well!
Shri Repp says
Thanks Ana for leaving a review. I updated the instructions to keep the heat on medium-medium-high even when the pot is closed after your feedback.It does speed the process up and reduce the time to cook for sure. The only pitfall this can cause is that if you have a small pot and the water is boiling vigorously it can sometimes foam over. As for the smell, haha beans and lentils do have a bit of a funky smell when initially cooked. Def something to get used to. Hope those insights are helpful and I'm glad you enjoyed the dish!
Soo says
Made this and it was so easy and delicious! I love how this serves as a “base” recipe and you can add in other flavors. As my first attempt at scratch Indian home cooking, it gave me so much confidence that I could try other things. Beware, you’ll definitely need to hit that x3 quantity button on the recipe because so you can eat to your stomach’s desires!
Shri Repp says
Ahh thank you so much Soo! It makes me so happy to hear that this recipe got you into Indian cooking <3
Jason says
The measures for making large quantities are gone 🙁
Shri Repp says
Ah sorry about that. It is back up now 🙂 Thanks so much for reporting it.
Kim says
This is so good and will be my go to meal when I'm in a hurry!
Thank you so much!!!
Shri Repp says
I'm so glad you enjoyed this Kim! 🙂
Phasing to Veg says
Wow. This is exactly the starter recipe I needed.
I love dal and sambar but have never been able to replicate.
Your site is extremely helpful in introducing the different kinds of dal and their uses.
I am going to start with this and hopefully learn to make delicious south Indian style dals and sambar at home.
I have a rice cooker, but not an instant pot or a pressure cooker.
What are the advantages of instant pot over pressure cooker or rice cooker?
Your pot pie recipe looks amazing.
Looking forward to trying your recipes. Thank you for breaking this down for people like me!
Shri Repp says
This makes me so happy to hear! I'm so glad you found this useful.
I really like an instant pot because it can act as my pressure cooker and rice cooker! The instant pot has settings which allow me to saute, cook rice, but then also cook lentils/beans on a high pressure. The pressure cooker can do all of these things as well but folks can find it intimidating to deal with the pressure cooker carefully. The instant pot also has settings so you can just set it and forget it when pressure cooking whereas the pressure cooker is set on the stove so you need to keep a bit more of a closeful watch.
That being said, you ultimately don't NEED any of these and you can get away with using the stovetop for thinner dals like moong dal or even making your rice on the stovetop. Hope that is helpful. I'm so excited to hear how these recipes work out for you <3