


An in-depth post on how to consistently make homemade puffy and crispy puris for pani puri.
What is pani puri?
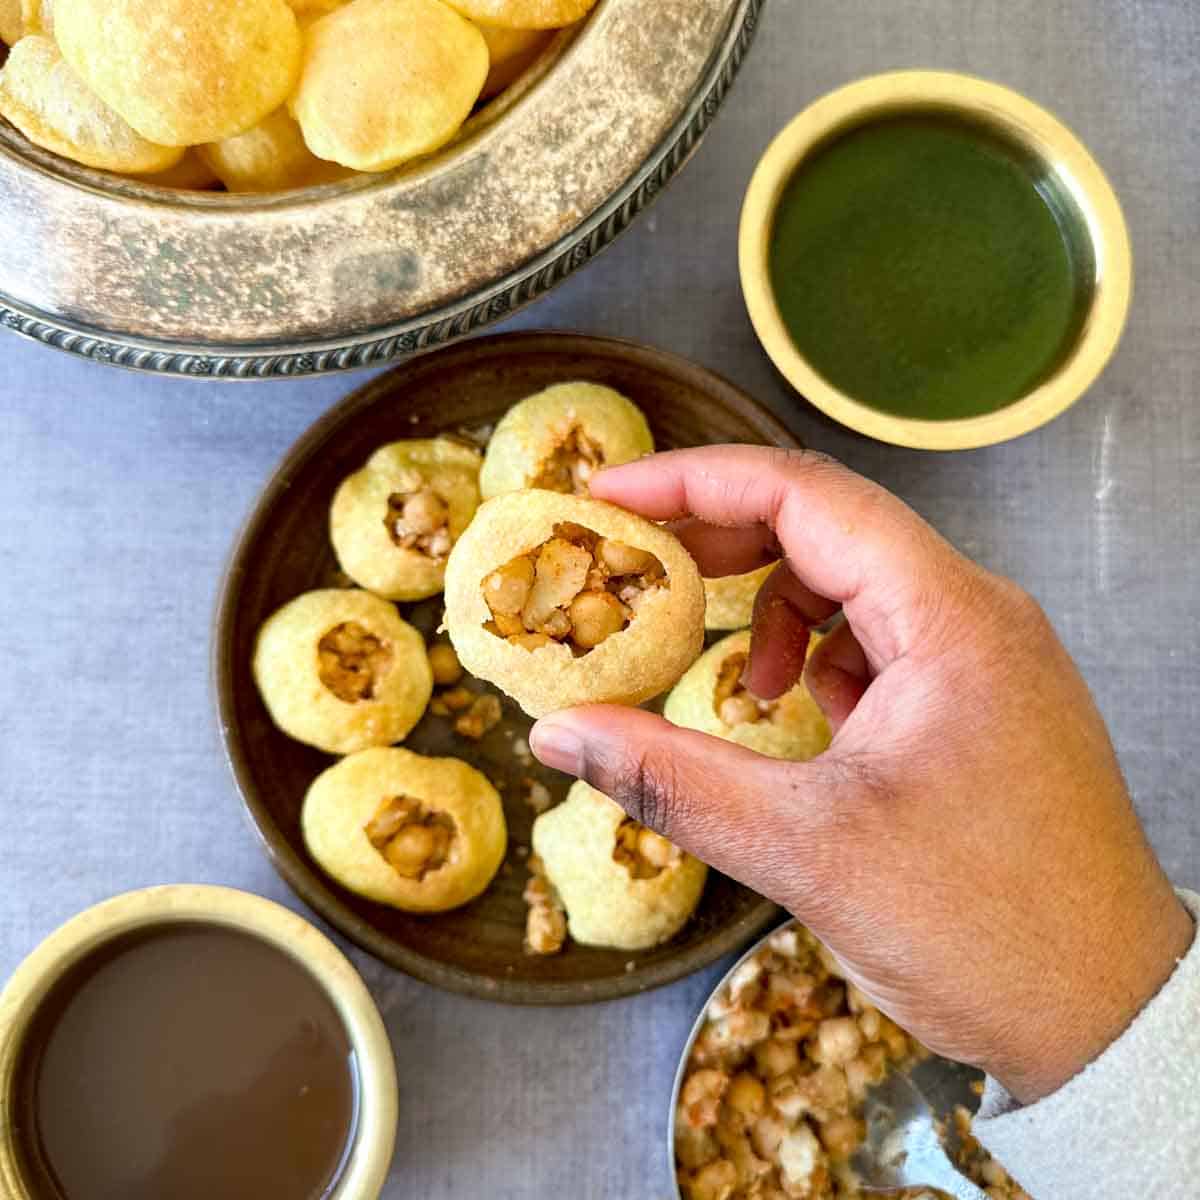
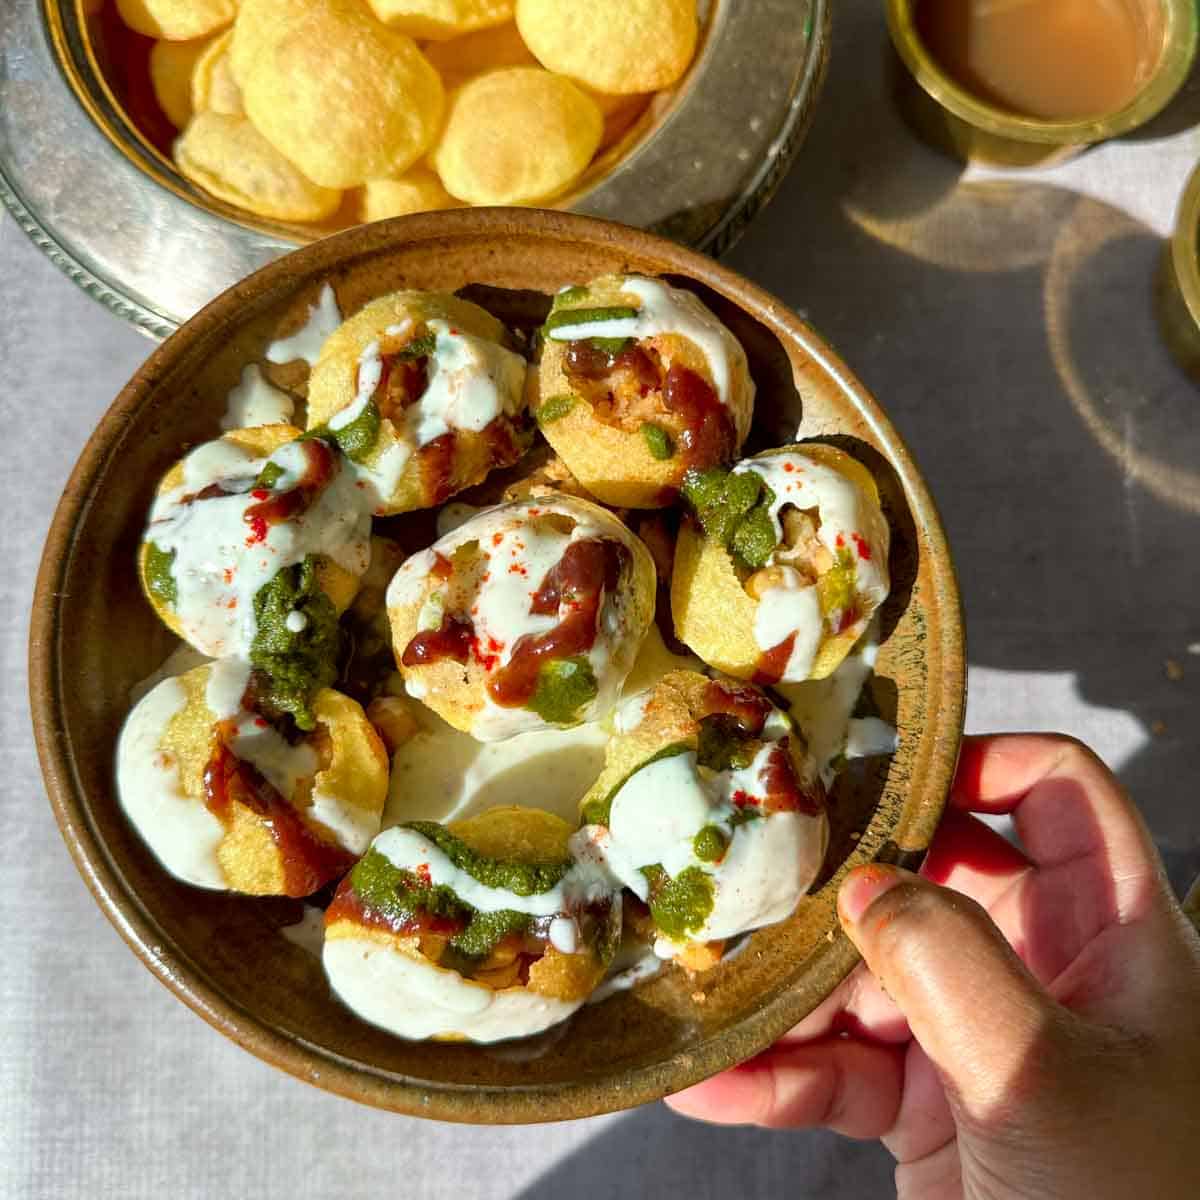
Pani puri is an Indian street food that consists of a hollow semolina ball called puri and a spiced water called pani. To eat a pani puri, you poke a small little hole on the exterior of the crunchy puri, stuff it with a potato and chickpea filling, dunk it in the pani, and pop it whole in your mouth.

Experiments to make the best puri
This blog post is an in-depth explanation on how to make the puris for pani puri at home. I was frustrated by the contradicting information I found on other websites and in books on how to make these puris. I made over 500 puris before publishing this blog post to test out various types of flour, rolling techniques, and frying temperatures in order to give you a recipe that will get you a puri that is puffed, golden, and crispy. Making pani puri is by no means easy but these tips will really help you avoid some common mistakes.
Best semolina type to use for pani puri
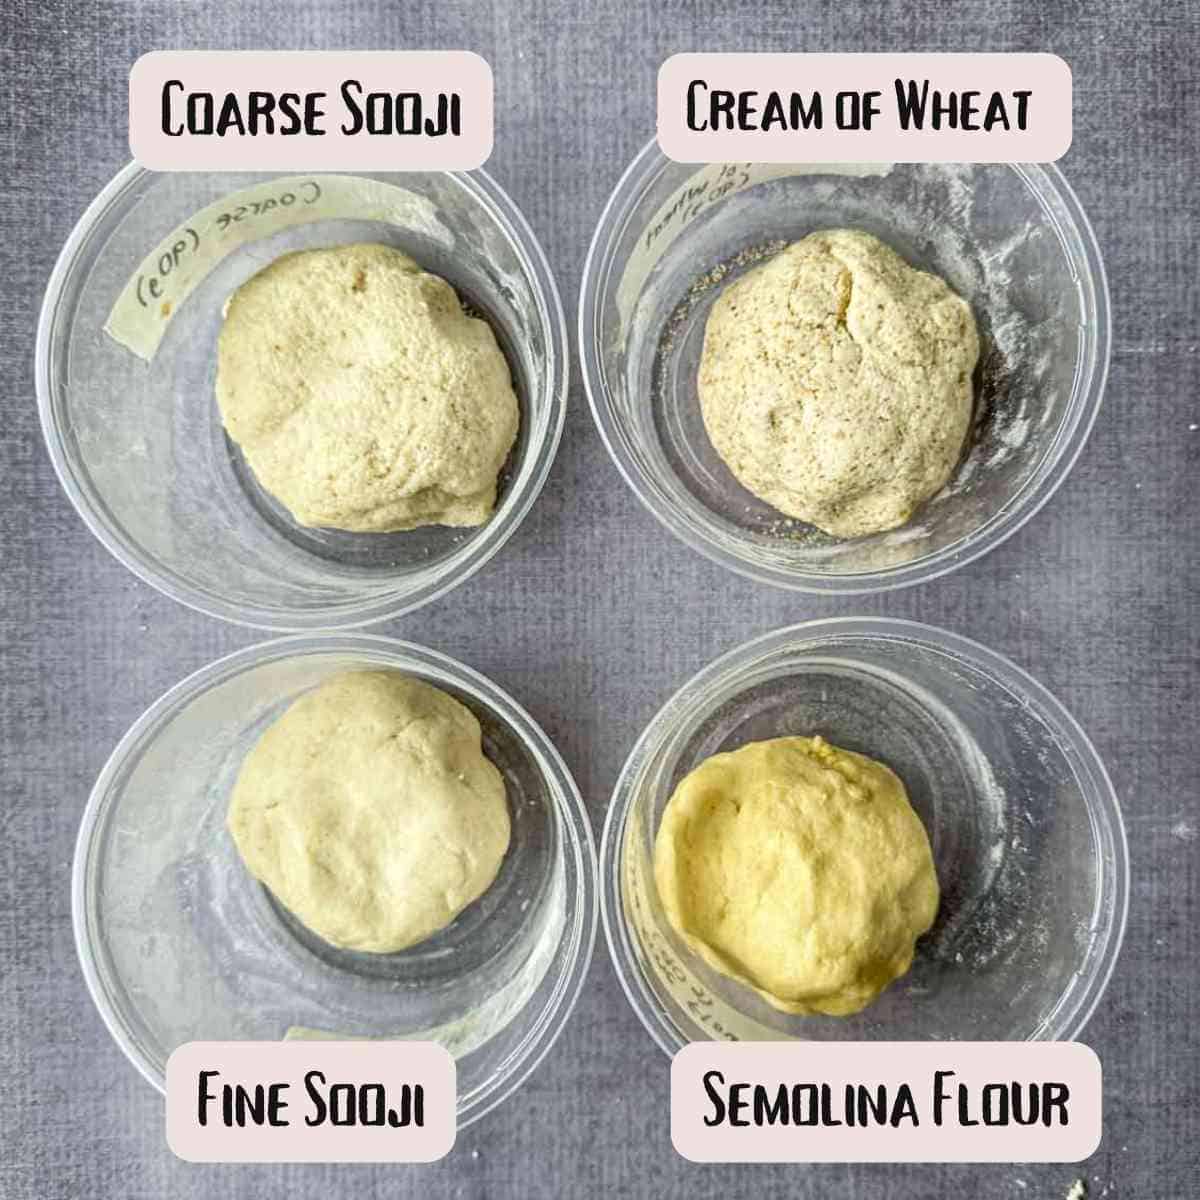
In my quest to create the best pani puri recipe, I tested out four types of flour to see which one yields the best puri. Typically sooji or rava is what is used to make pani puris. It is a flour that when fried yields a crunchy and crispy exterior compared to using all purpose flour.
Semolina vs. Sooji
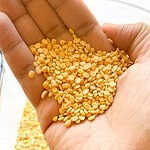
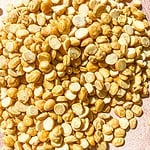
The first thing to learn is that semolina sold in the United States is NOT the same thing as sooji, which is sold in Indian grocery stores. Sooji, which is also known as rava, is sold in Indian grocery stores and is often labeled as semolina. However, these two products are different. The Indian variety of semolina (aka sooji/rava) is actually made from many different variety of wheats and is a whiteish color while American semolina is yellow in color and is made only from durum wheat.
The name that is used in America to refer to sooji is actually farina, aka cream of wheat. Something must have gotten lost in translation, but in general American semolina, sooji, and farina are all wheat middlings or some combination of the of the wheat particles from milling process that is not flour.
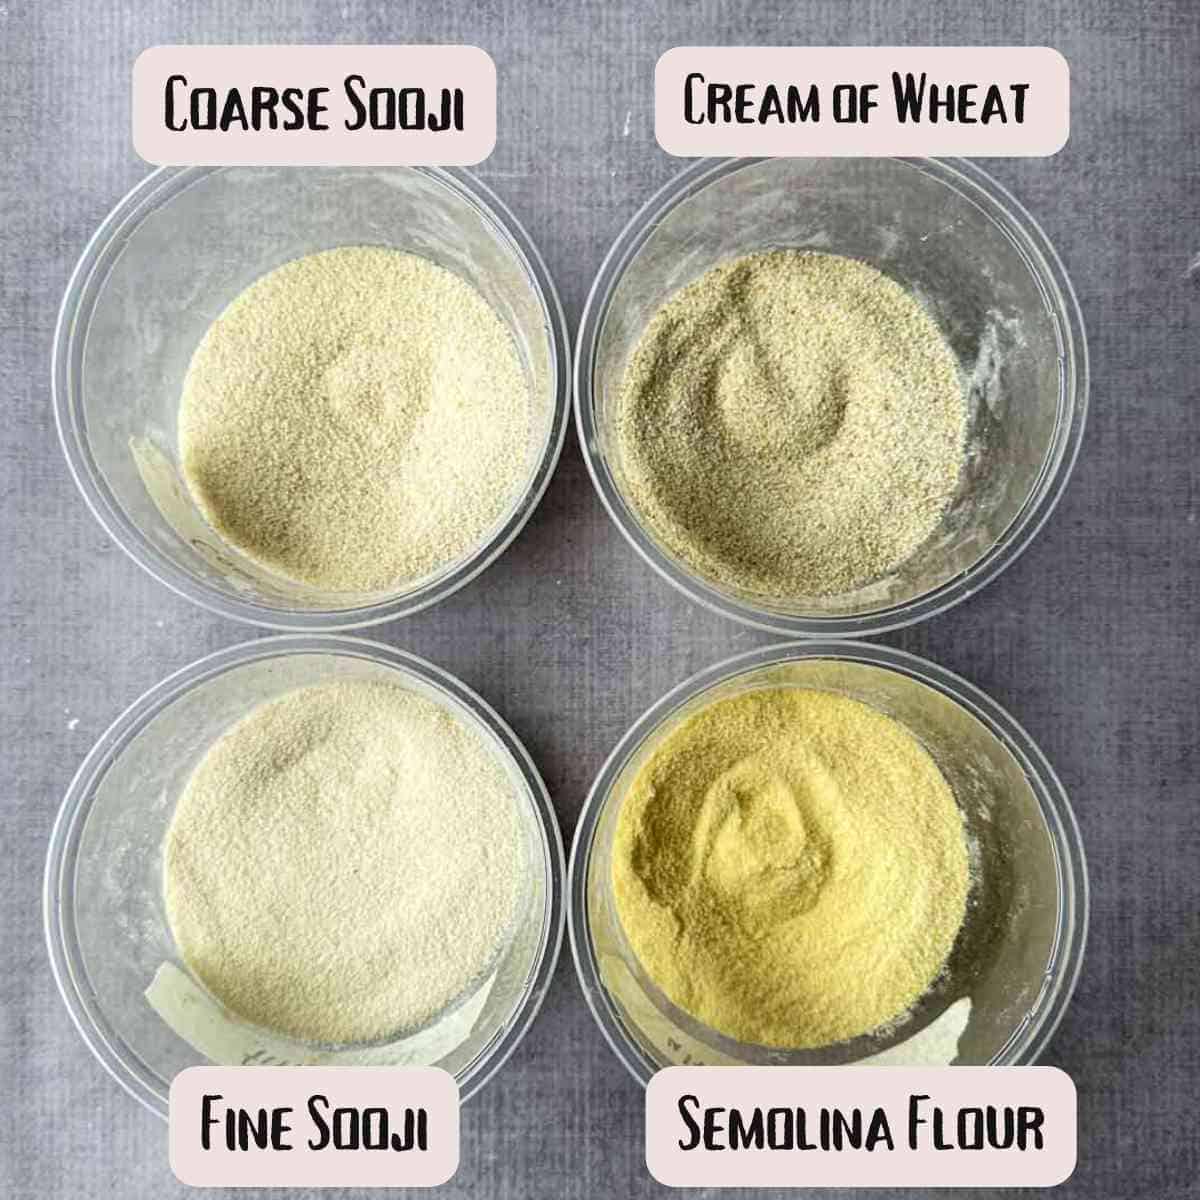
Semolina Flour vs. Fine Sooji vs. Coarse Sooji vs. Cream of Wheat
This misnomer of Indian semolina intrigued me so I ran an experiment testing the American semolina vs. the Indian sooji/rava. However, I didn't stop there. As mentioned earlier, farina, aka cream of wheat, is not made completely from durum wheat so in theory I thought this would be more similar to sooji. So I added that to the list as well. Additionally, sooji comes in two grind types, fine and coarse. So I tested these four types of flour in making pani puri dough. Here is a table that describes the properties of these flours:
| Flour Type | Availability | Color | Coarseness 1 (fine) - |
|---|---|---|---|
| Semolina Flour | American Grocery Stores | Yellow | 1 - Most Fine |
| Fine Semolina | Indian Grocery Stores | Tan | 2 |
| Coarse Semolina | Indian Grocery Stores | Tan | 3 |
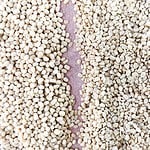
| Cream of Wheat (Farina) | American Grocery Stores | Tan with speckles of brown | 4 - Most Coarse |
Finer flour makes better puris
I made batches of dough with everything remaining constant except for the flour type. I tested these doughs with 3 different rolling techniques (which I will cover below) but they consistently showed the same results amongst all trials. The finer flours required less time to hydrate, created a supple dough that was easily rollable, and yielded a higher percentage of puris that puffed.
| Flour Type | Dough Description | Puri Puffing Ranking (1 best - 4 worst) | Puri Description |
| Semolina Flour | * Supple and hydrates quickly * Easy to form and roll | 1 - Yielded the lightest and puffiest puris | Light, airy, puffs consistently, yellow hue, nutty in taste |
| Fine Sooji | * Starts off too wet but quickly hydrates and becomes easy to work * Easy to roll | 2 - High proportion of puffed puri | Puffs semi-consistently, white/tan hue |
| Coarse Sooji | * Takes a long time to hydrate * Rough texture makes it hard to knead * Hard to roll, becomes dry easily | 3 - Lower proportion of puffed puris | Puffs occasionally, can be dense |
| Cream of Wheat | * Very dry * Rough texture makes rolling hard. Dough often breaks apart | 4 - Yielded mostly flat, hard discs | Flat, hard, dark discs |
The coarse flour was really grainy and almost hurt my fingers to knead because of the texture. I did need to sprinkle a bit more water on the coarse sooji and cream of wheat as they were very dry even after the resting period. The cream of wheat was the worst flour as it led to hard dense discs that almost never puffed when frying. The cream of wheat had really large brown speckles which are large bran particles that inhibit gluten formation. I hypothesize that these large bran particles prevented the dough from forming strength and flexibility it needed to expand.
The semolina flour absorbed the water really quickly and yielded a dough that was super supple and easy to work with. When working with the fine sooji, it took a couple seconds of mixing the dough for the flour to absorb the water as it started as a wet mixture at first but then became just as easy to work with as the semolina flour after ~30 seconds of mixing the dough which was a fascinating to witness.
The semolina flour puffed more consistently than the fine sooji. Using the semolina flour also gave the puris a slightly nuttier taste and a yellow hue. I really enjoyed the nuttier taste of the semolina flour puris and the consistency they provided for the puris puffing so this is why it is now my preferred flour to use when making puris for pani puri. However, fine sooji is a close 2nd place contender.
Pani puri rolling techniques
In order to get a puri to puff, you need to roll out the dough evenly. This helps the puris separate and an air pocket to fill in the center.
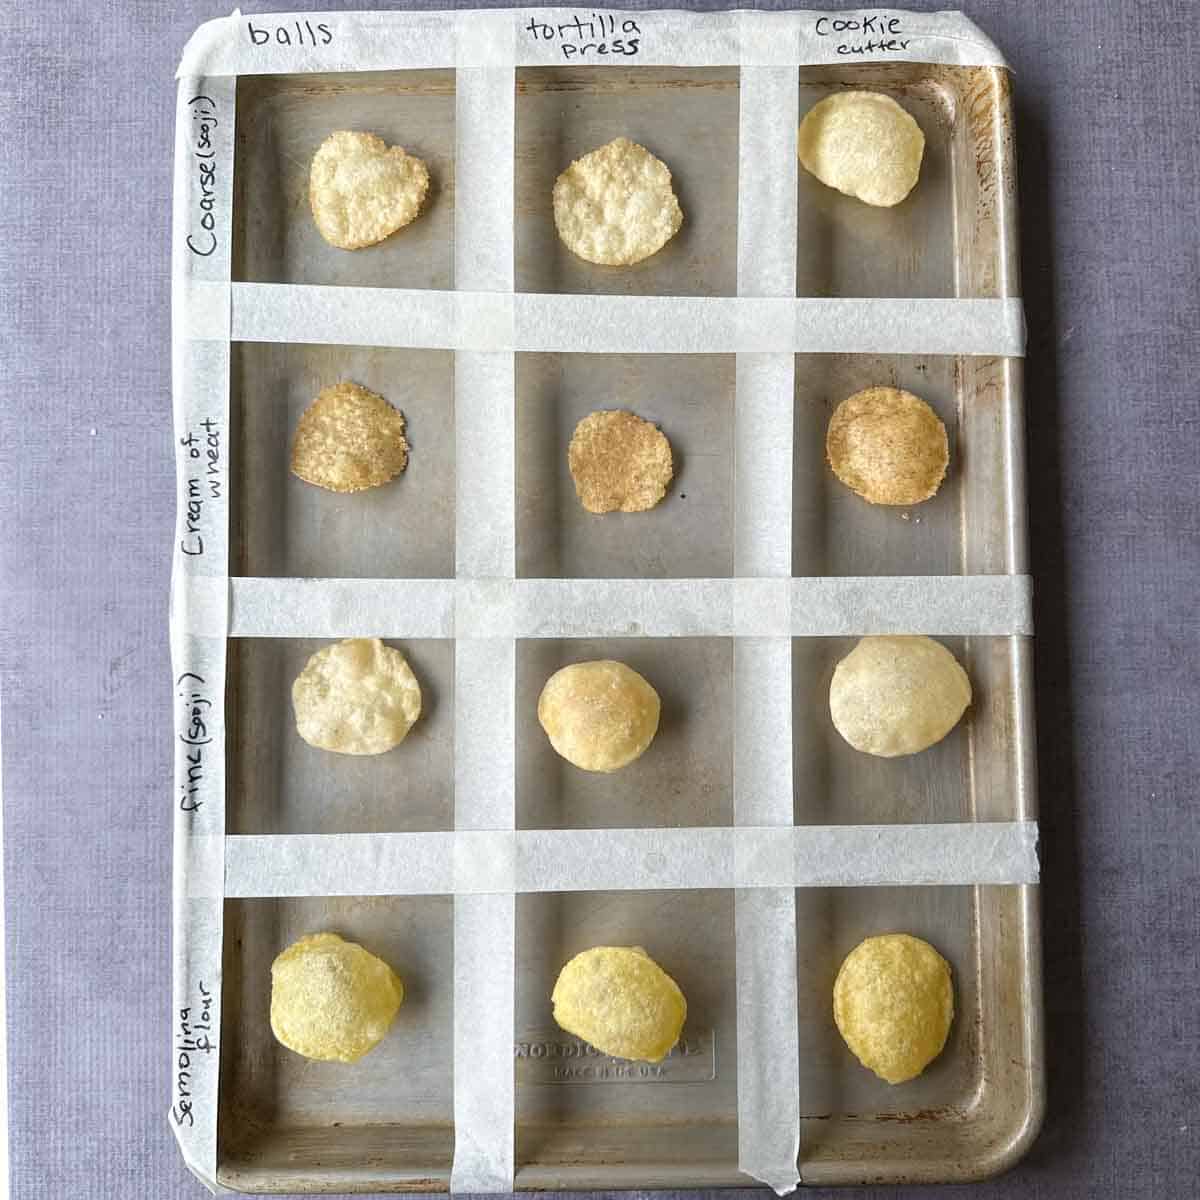
I tested three different methods of rolling out the puris to see which one would yield a higher percentage of puffed puris. The first technique was to use a tortilla press to flatten individual balls into puris. The second technique was to use a rolling pin to roll out individually portioned dough balls. The third technique was the roll all the dough into a large sheet and use a cookie cutter to get individual puri circles. Here are my observations of difficulty and how these effected puri puffing.
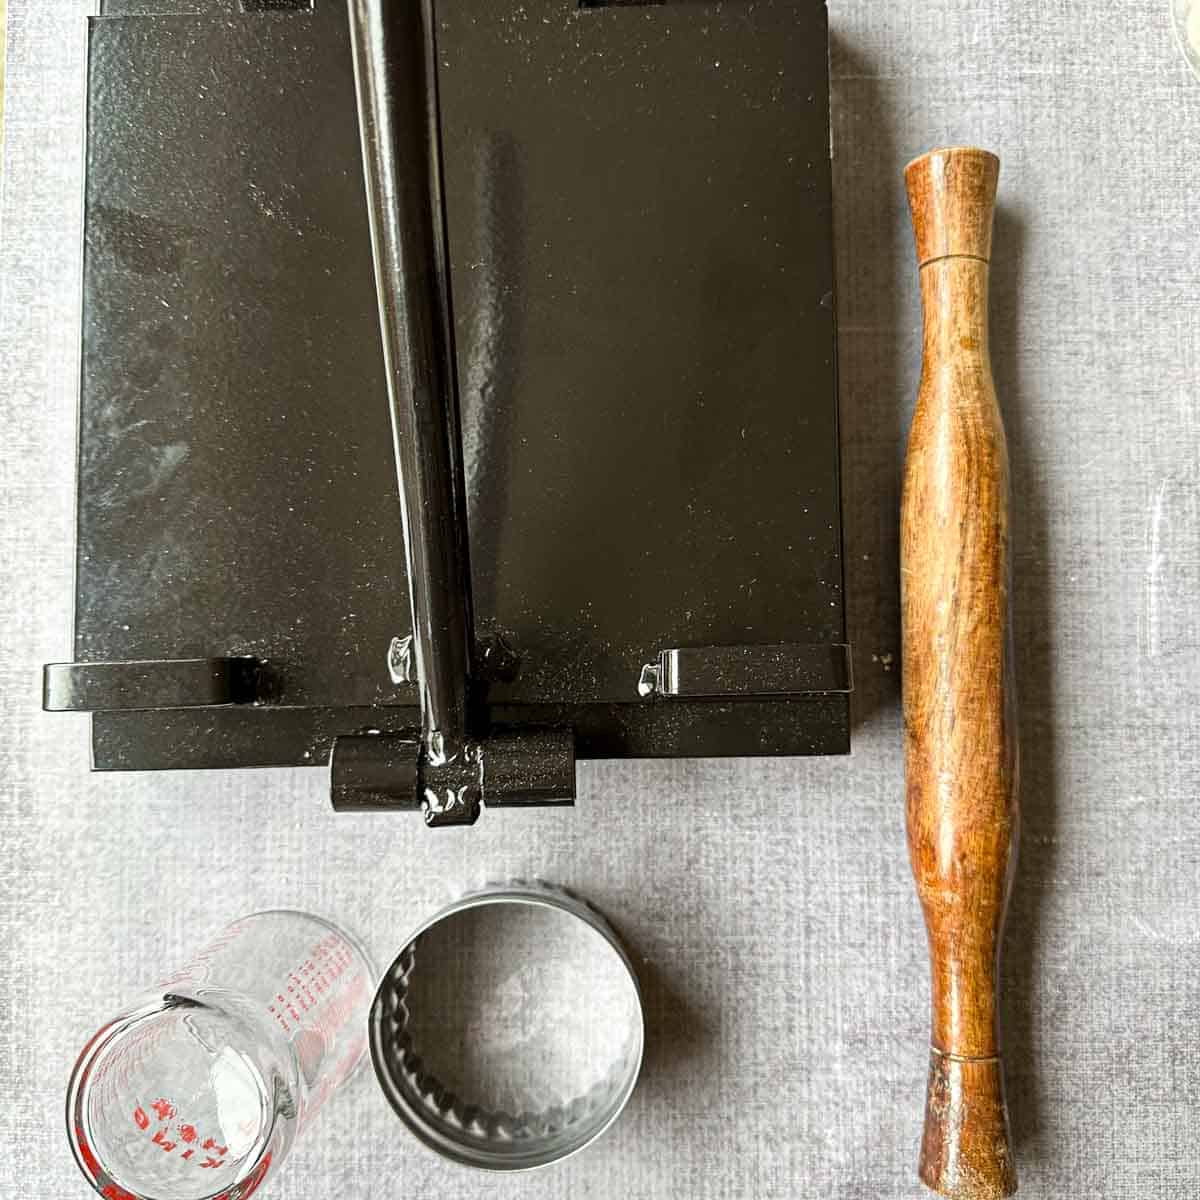
| Rolling Technique | Description of Technique | Ease | Puffing | Notes |
| Roll from balls | Individually portion balls that are ~4g in size. Use a rolling pin to roll balls into a circle | Medium | Inconsistently | + Don't need special equipment + Uniform amount of dough per puri - Hard to form perfect circles - Using normal sized rolling pin makes it difficult to evenly roll out small amount of dough. |
| Cookie Cutter | Roll out the dough into a large sheet. Use a rolling pin to roll out dough into ¼ inch thickness. Cut circles out with a 2 inch diameter cookie cutter | Medium | Consistently puffed | + Easier to get even thickness when rolling out a large sheet of dough + Beautiful circles when cutting - Slightly tedious having to re-roll scraps to make more circles - Can yield thicker/heavier puris if not rolled thin enough |
| Tortilla Press | Individually portion balls that are ~4g in size. Use a tortilla press to press balls into circles | Easy | Semi-consistently | + Can quickly press out puris + Uniform amount of dough per puri - Puris tend to retract significantly after using this method due to gluten - Need special equipment for this method |
Best rolling technique for puris for pani puri
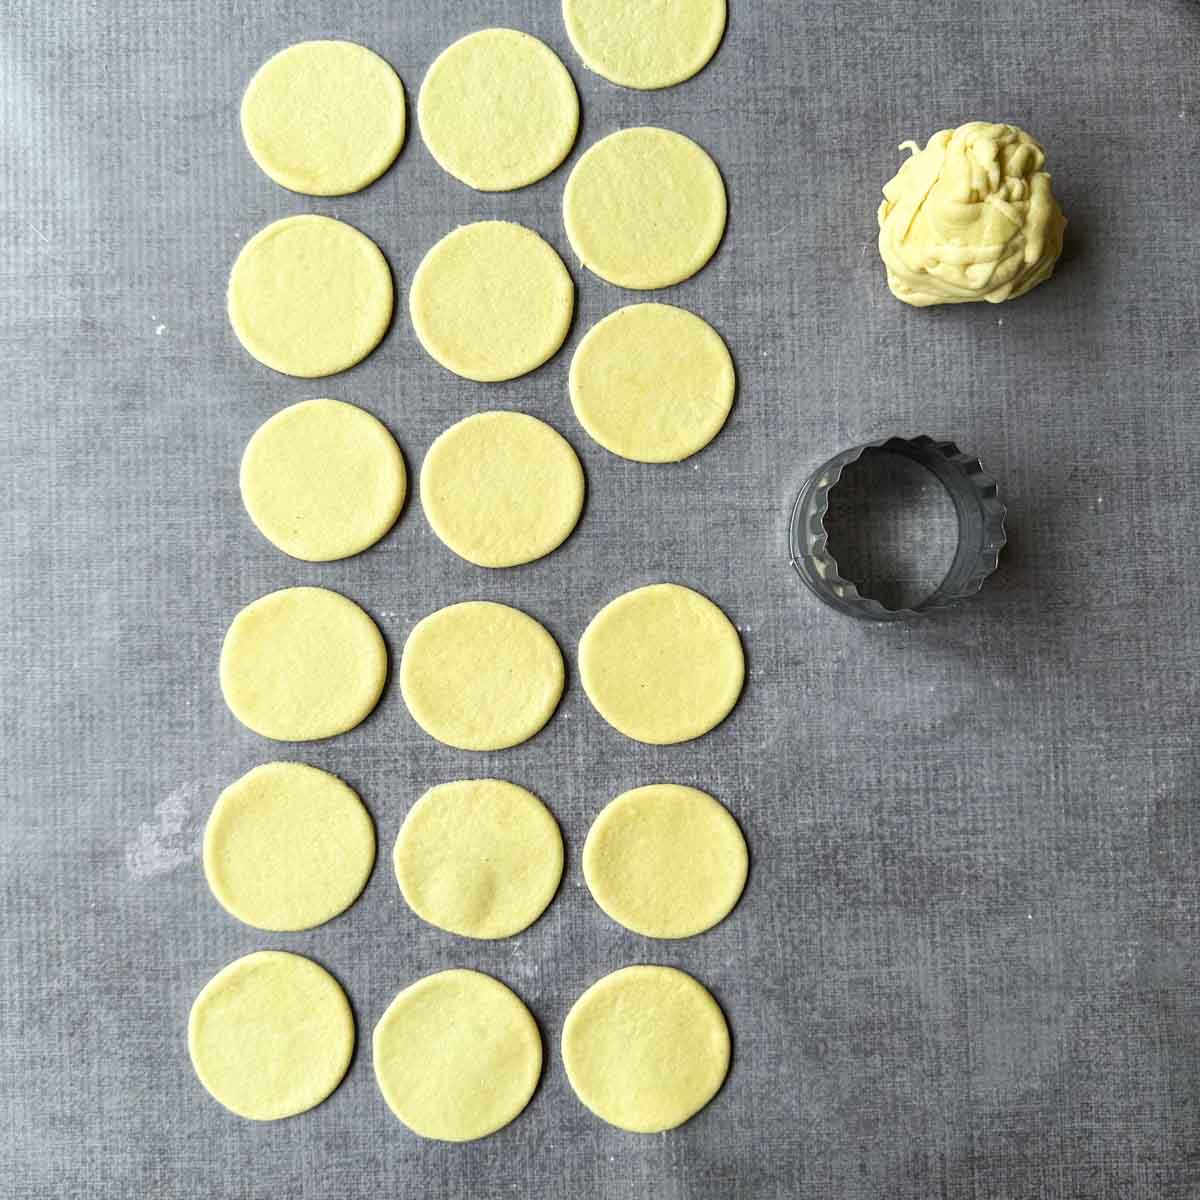
Out of the three techniques, the cookie cutter technique is my top ranked technique. It was the technique that consistently yielded puris that puffed regardless of the dough used, used tools that are fairly easy to source, and yielded beautiful circular puris. It was easy to roll out dough evenly when working with a larger quantity. However, if you fail to roll the dough to ¼ of an inch thin, the puris can be slightly thicker than what you get at the store; but to me getting a puffed puri is a bit more important than thickness.
Using the rolling technique with balls was quite difficult as it requires a lot of skill to roll out the dough balls evenly. I think this technique would be easier if you had a small dowel rolling pin that is used to make dumplings. It was quite difficult to use a regular sized rolling pin and attempt to control it to roll out the dough evenly and in a circular shape. This resulted in puris that were the least likely to puff.
The tortilla press was great at pressing the dough balls down into an even flat disc. However, tortilla presses are usually used for corn tortillas or tortillas with less gluten. When puris were pressed using this method, they would immediately retract and shrink, leading to tough puris that were small and didn't puff as consistently as the cookie cutter method.
Oil temperature for frying puris for pani puri
Oil temperature is very important for frying puris for pani puri. If you use a temperature that is too low, then the puris will still be soft and slightly soggy once fried. In addition, the puris won't puff as dramatically with colder oil. On the flip side, if the oil is too hot, the puris will take on too much color and burn, leading to a bitter tasting puri. This can surprisingly also yield puris that are soggy as you don't give enough time for excess moisture to evaporate. It is ideal to keep your frying oil between 375F - 400F when making puris. The puris should take about 1 minute total in the oil with each side taking about 30 seconds.
Baking powder in puri dough
When making pani puris, baking powder is not completely necessary for puris to puff, but it does help with the leavening or puffing of the puris. In addition, adding baking powder prevents the pani puri from taking on too much brown color when frying. Do not use baking soda as this will cause the puris to over-brown.
Tips for getting a crispy puffed puri
- Use the cookie cutter method to cut out pani puris. Using the cookie cutter method is more likely to get puris that puff consistently.
- Measure ingredients for the dough in grams. I've included the gram measurement for making pani puri. Use that measurement to get precise measurements for your puri dough.
- Use semolina flour or fine sooji. American semolina is my first pick for pani puri dough even though this isn't traditionally used. My second pick is fine sooji. Both of these ingredients are fine in texture and yield a supple dough that is easy to work with. These doughs also roll easily and result in puris that puff consistently.
- Keep dough covered when not in use. When the puri dough is not in use always cover it with a damp towel as it can dry easily. Once the puris are rolled out, place them on a parchment line tray and keep them covered as well. This helps ensure that there is enough moisture in the dough, which will help create the steam that the puris need to puff.
- Place puris in oven once fried. For extra crispy puris that last a long time, place the puris in a low heat oven at 200F to rid them of any excess moisture that may remain.
Store-bought vs homemade puri
I know that this is a long post on how to make puris at home. However, making homemade puri is absolutely not required for eating pani puri at home. In fact, when I was growing up my amma (mom) never made this component at home; she would buy it from the grocery store. So don't feel bad if this project is not quite something you want to take on just yet.
Here are some alternatives to making pani puris at home. My favorite store-bought pani puris are the ones that are already fried and sold in large boxes. I prefer these to the ones that are sold as dried discs to be baked or fried at home. The dried discs are usually made with rice flour and remind me more of fryums instead of the street-side puris I grew up eating, which are made from semolina. The pre-fried puris almost always use semolina. If you go with the store-bought variety, make sure to lightly toast the puris in the oven at 200F to crisp them back up.
Recipes with Puris
Pani Puri
Dahi Puri
Frequently Asked Questions
Puris can last weeks if not months if stored properly. Make sure to store puris in an airtight container in a dry place. Make sure puris have completely cooled before storing.
It is important to get rid of excess moisture in puris to make them crispy. This can be done by frying the puris at a temperature of 375F-400F for 30 seconds on each side. In addition, placing the puris in the oven at 200F for ~20 mins also eliminates any excess water that may remain. You can read more details in this blog post about creating cripsy puris.
The best rolling technique to yield the puffiest puris is the cookie cutter method. Checkout the full blog post which goes over an experiment where 3 rolling methods are tested head to head.
Either semolina flour or fine sooji are the best flours to use for puris. You can checkout the pros/cons of each flour which is written in detail in this blog post.
The best temperature to fry puris for pani puri is 400F. Try to keep the oil between 375F - 400F during the entire frying process.

Homemade Crispy Puri for Pani Puri
Ingredients
- ½ cup (90 g) semolina flour or fine sooji
- ½ teaspoon baking powder
- ⅛ teaspoon (50 g) sea salt
- ¼ cup water
- 1 teaspoon neutral oil plus more for frying
Instructions
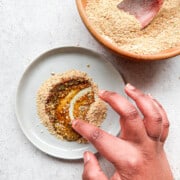
- Mix ½ cup (90 g) semolina flour or fine sooji, ½ teaspoon baking powder, and ⅛ teaspoon (50 g) sea salt in a medium bowl.
- Add ¼ cup water, then mix and knead to form a dough that should start wet, but form a non-sticky dough after kneading. Drizzle the dough with 1 teaspoon neutral oil and coat to ensure that the dough doesn’t dry out.
- Cover the dough with a towel and allow it to rest for at least 30 minutes. This allows for the semolina to absorb the water and hydrate.
- On a clean working surface, roll the dough into a large rectangle that is roughly ⅛ inch thick, or 7 inches by 13 inches in dimension. The dough should be firm enough that no excess flour should be needed. It helps to frequently pick up the dough and do quarter turns to ensure that the dough doesn't stick to the counter and is rolled evenly.
- Use a 2 inch diameter cookie cutter to cut out circles. The circles may contract slightly once cut so make sure to lightly roll over them to ensure the 2 inch diameter. Transfer them to a parchment-lined sheet tray and keep covered until ready to fry.
- Heat a deep, heavy bottomed pot with at least 3 inches of oil to 400 F. The oil throughout the frying process should stay between 375 F and 400F.
- Carefully, drop a few discs in the oil. The number of discs added depends on the width of your pot. Make sure not to overcrowd. The discs should drop and then float to the top of the oil. When they float, use the back of a slotted metal spoon to press down on the surface of the puris and submerge the tops in the oil. This is to help promote puffing. Continue to press and cook for 30 seconds on one side and 30 seconds on the other. The pani puri should have light tanning on the surface. Remove puris and place on a wire rack or paper-lined tray.
- If storing for later use, it is helpful to place puris in the oven on 200F heat for 10-15 minutes to remove any remaining moisture that may be left over. Allow the puris to completely cool before storing t in an airtight container. Puris will last up to 2-3 weeks.
Notes and Tips
- Using American semolina flour or Indian fine sooji is important for this recipe. Using a coarse variety will decrease the chance that the puris will puff.
- Rolling the puri dough evenly is very important for this recipe to help the puris puff.
- If the puris are still soft after frying, you can place them in the oven at 200F for 10-12 to eliminate any excess moisture.
Sharif Mujawar says
Good job.
I have also done sake kind of experiment with same objective.
I got one better method. Will make machine on the basis of understanding.